Live Alerts
This guide will walk you through the process of setting up Twitch live alerts for your Discord server.
What are Live Alerts?
Section titled “What are Live Alerts?”Live alerts display notification messages in a specified channel in your Discord server when the chosen user goes live on Twitch. These messages can be automatically updated or removed when the stream ends.
The Live Alerts List Page
Section titled “The Live Alerts List Page”Select the Live Alerts tab from the sidebar in the web dashboard.
Afterwards, you will be presented with the list screen. In my example screenshot, I have one alert setup for my own stream.
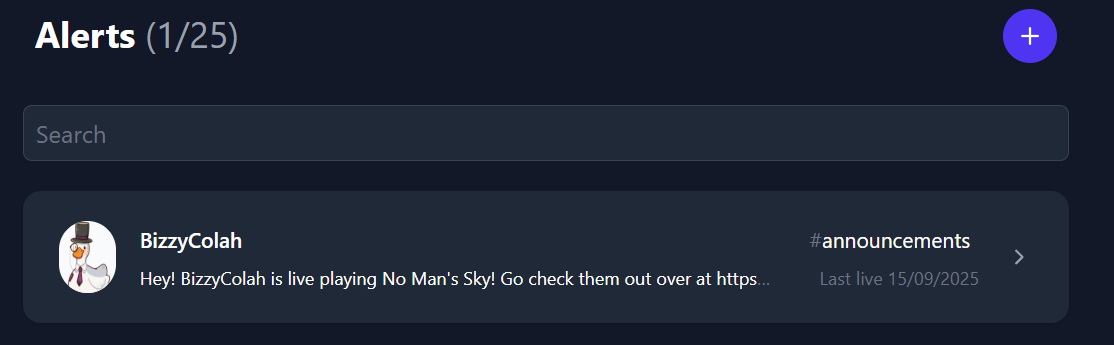
the + button can be used to add a new alert. Clicking on an existing alert will take you to edit the alert.
The number next to the Alerts title denotes how many alerts you have and your maximum allowed alerts (in this example, 1 out of 25). This limit can be increased if needed by contacting me.
Adding a new alert
Section titled “Adding a new alert”Click the + button to add a new alert.
In the below screenshot I’ve gone and filled out all the fields so you can see an overview of the options and the preview.
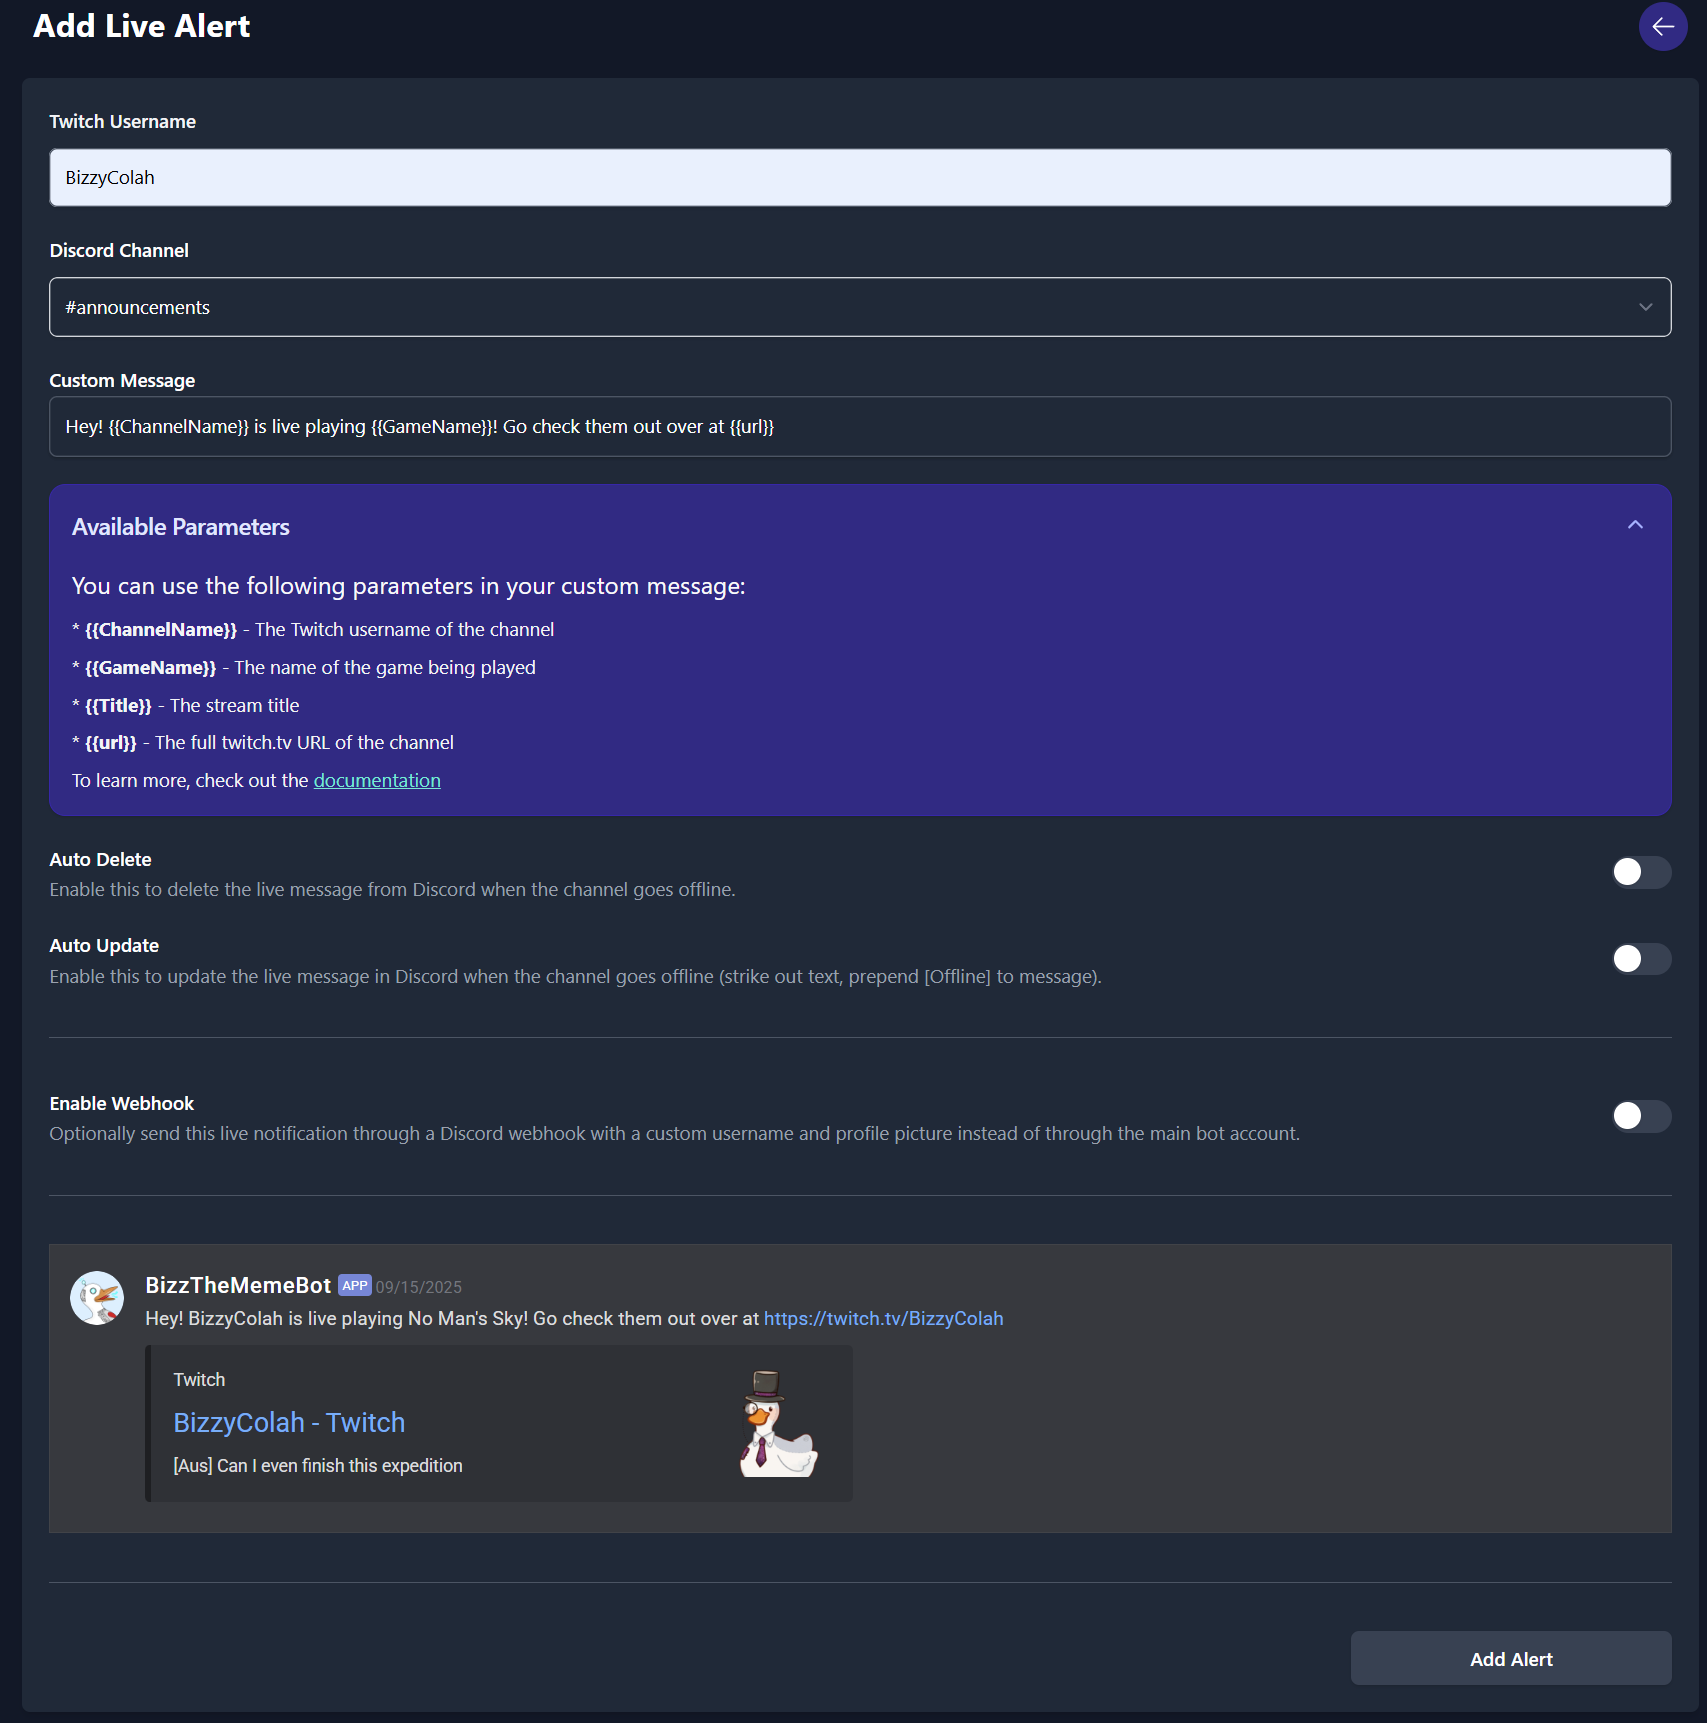
The first field is the Twitch username, and once entered, the preview will update to show the correct details based on the last title and game played by that user.
The second field allows you to select a Discord channel to send the message to. If you are using a webhook URL, this will be ignored, as Discord webhook URLs are tied to a specific channel.
The next field is the custom message field, and below it is a dropdown that describes the custom variables you can use in your message.
The default message is set as Hey! {{ChannelName}} is live playing {{GameName}}! Go check them out over at {{url}}.
If you type @ and start typing the name of a user or role, a dropdown will show allowing you to easily select what you’d like to mention. This will be converted to the numerical ID that Discord uses internally for mentions (so don’t worry if you see that).
Similarly, you can also type : and start typing the name of a custom emote in your server to add it to the message.
The next two fields are checks for what you’d like to use if the user goes offline. One deletes the message, the other updates it by prepending [Offline] and striking the text out.
Note that you can only select one or the other, not both. If you try to select both, the other will be automatically deselected.
Webhook Settings
Section titled “Webhook Settings”The next section is the alert-specific webhook.
Before we set our settings, you’ll need to create your webhook URL in Discord.
In your Server Settings in Discord, you will find webhooks under Apps -> Integrations -> Webhooks.
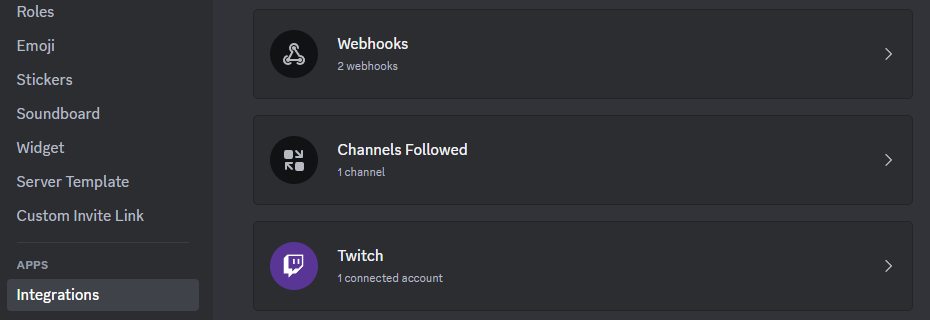 Click Webhooks and click the New Webhook button.
This will create a new webhook with a random name, click to drop it down and you can configure it.
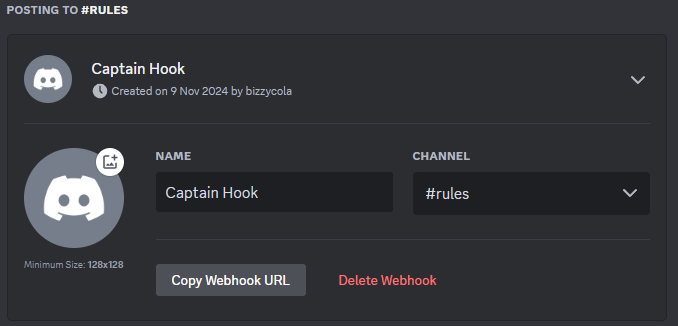 You don’t need to set a username as pfp here if you don’t wish to, as you can override this directly when you setup alerts in the dashboard.
Change the channel to your desired channel to post in, click Save Changes.
Click Copy Webhook URL, which will put the URL in your clipboard. We’ll need this later.
Now you can enable and configure your webhook settings.
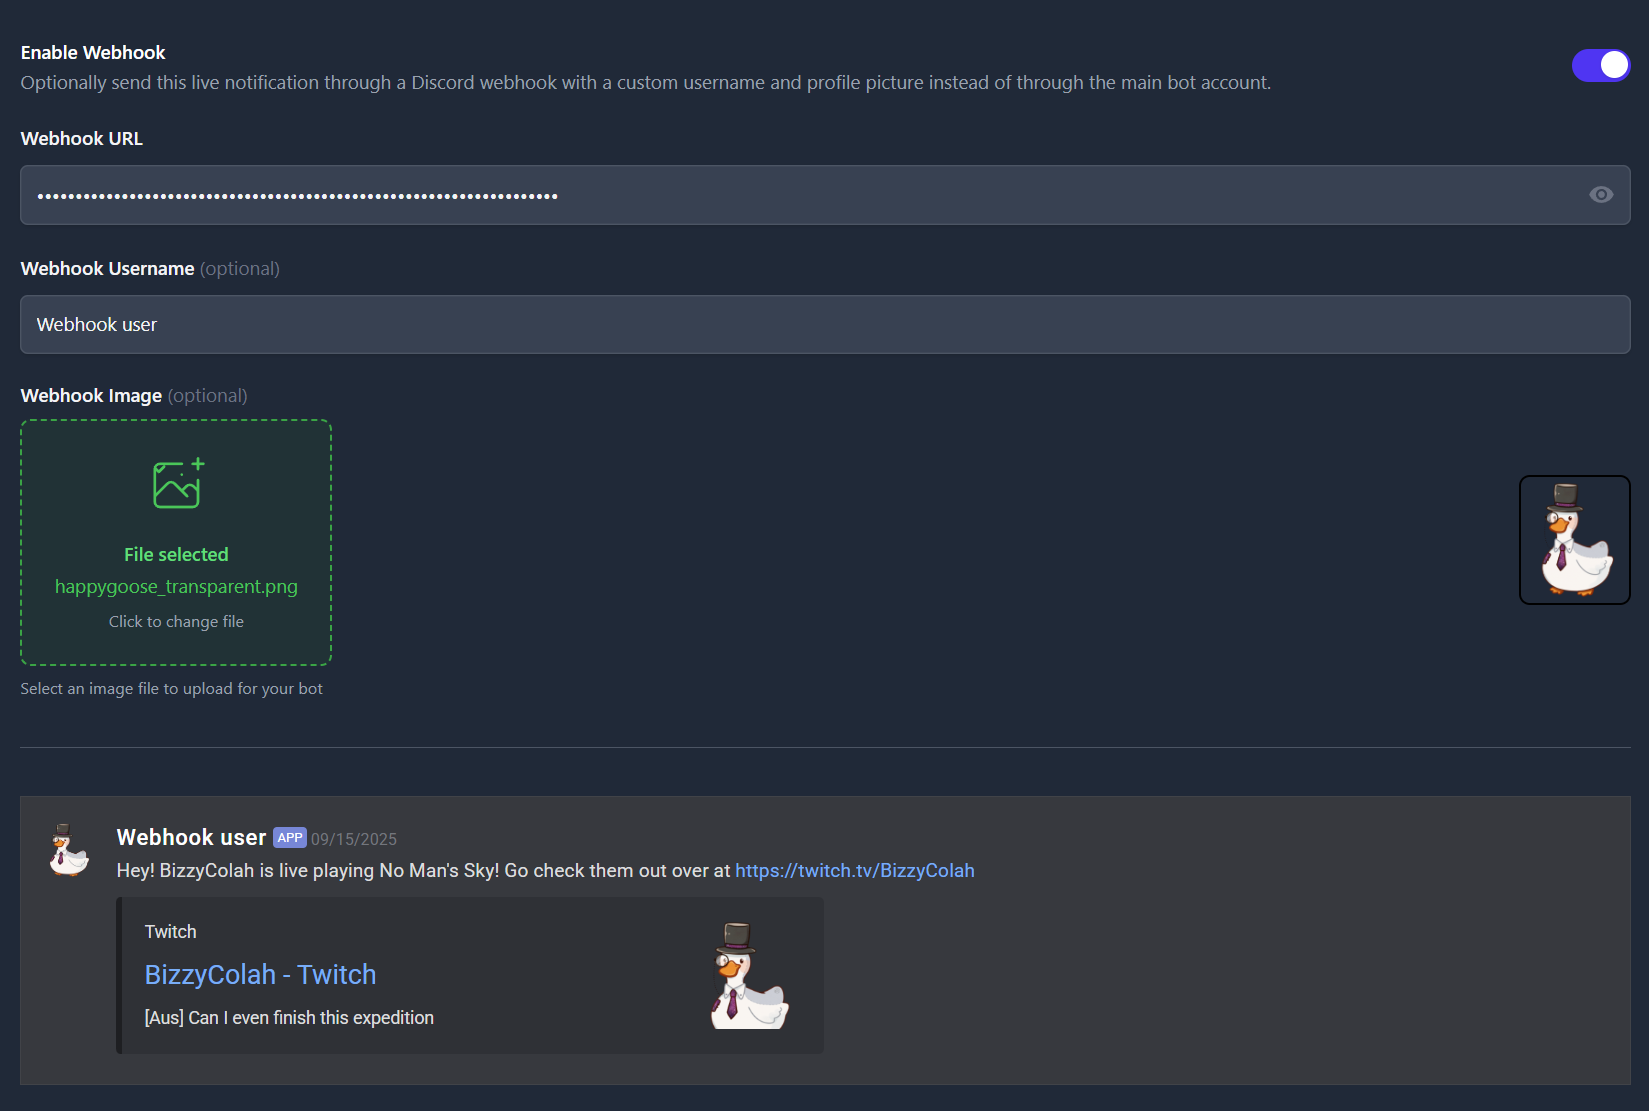
If you want to setup one single webhook to handle all (or at least any alerts without a specific webhook set), you can do so on the Settings page in the dashboard.
Now all you have to do is save the alert and wait for your friends (or yourself!) to go live.